Photoshop City Underwater Photo Manipulation

Tutorial
In this tutorial , I will show you the steps I took to create Photoshop City Underwater Photo Manipulation.
This is an intermediate tutorial so some steps can be tricky - if you are having difficulty with it , I suggest you go to the basic section of Photoshop , practice those tutorial first , or watch my previous video of Photoshop , practice those tutorial first , then come back and do this one.
Details of Tutorials:- Software: Photoshop CS6
- Completion Time: 6 minutes
- Difficulty: Medium
Resources:- City
- Sea
- Image
- Shark Fish
- Wood
- Software: Photoshop CS6
- Completion Time: 6 minutes
- Difficulty: Medium
- City
- Sea
- Image
- Shark Fish
- Wood
There are some steps we have to follow .
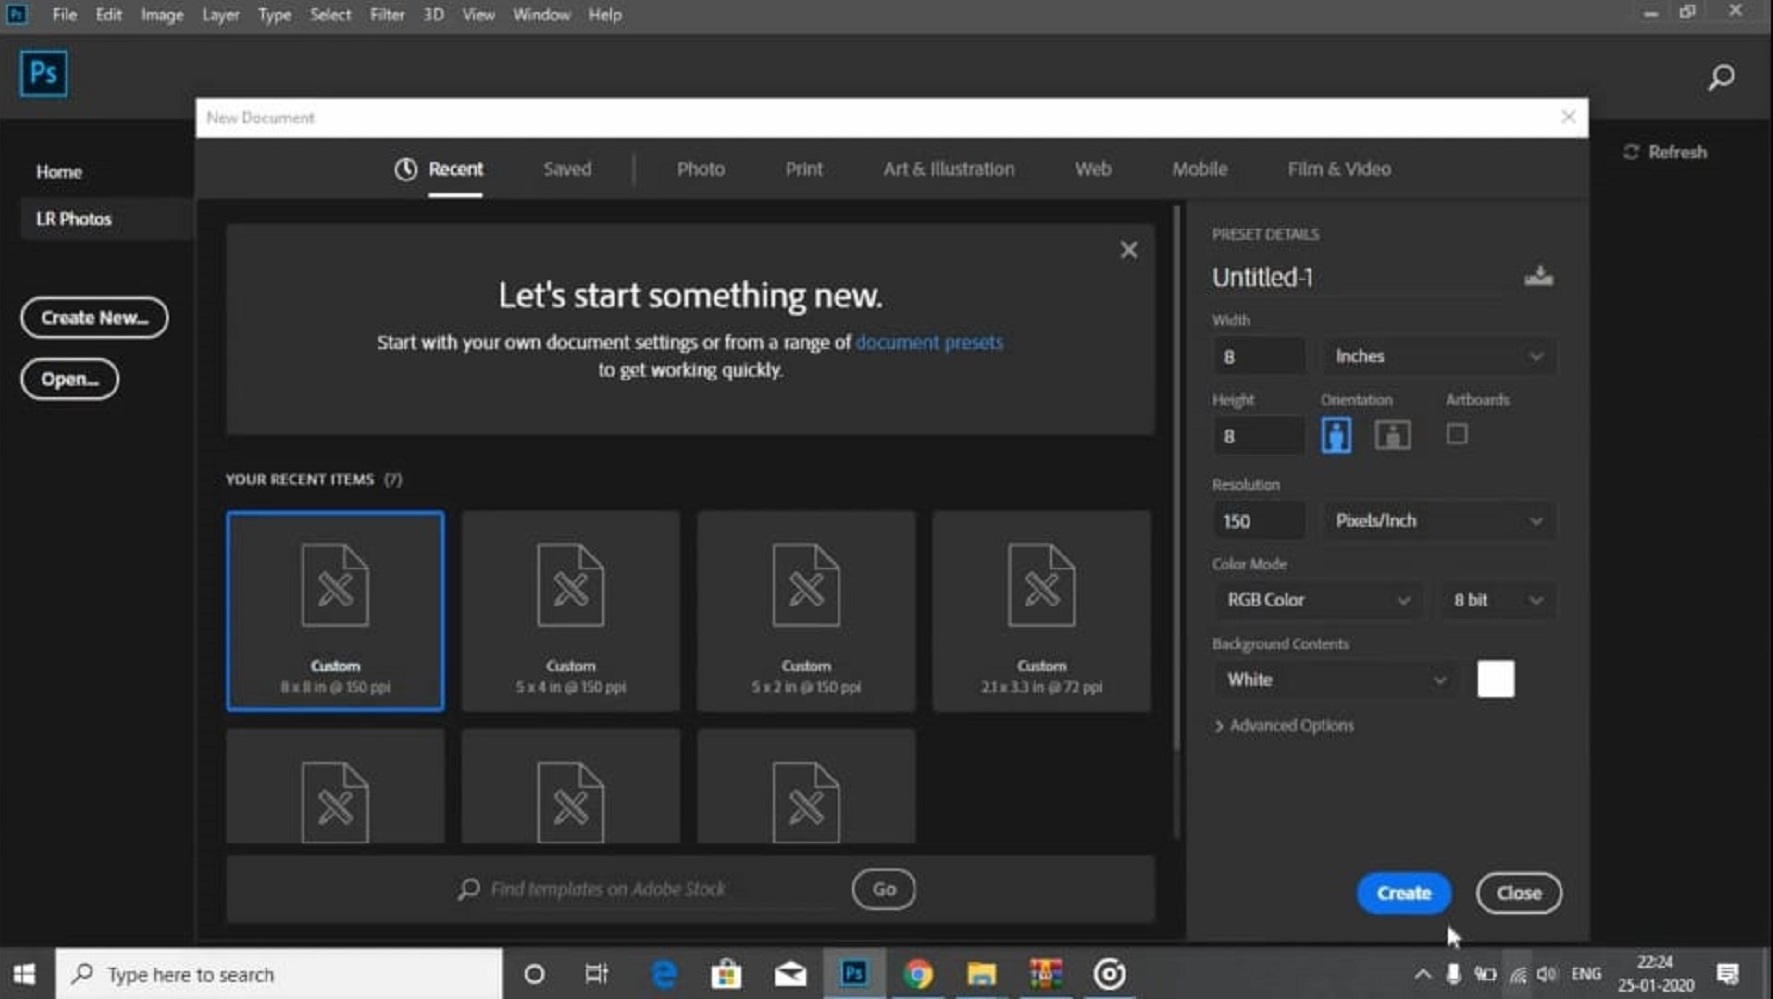
STEP 1:Open Photoshop, Create a new layer by clicking File > New ,then set background height, width, color, and resolution.

STEP 2:Import the City image by clicking File > Open, select the whole city image by clicking Rectangular Marquee Tool, then Drag city image into the white Layer using Move Tool.

STEP 3:Import Sea image by clicking File > Open and adjust sea image by clicking Rectangular Marquee Tool, place that sea image exactly middle of the Layer.

STEP 4:Import Boy image by clicking File > Open , unlock that image by clicking right side of the unlock button , then we have to remove the background of that image by clicking Rectangular Marquee Tool then click in select and mask option on the property bar ,then click select subject, then click OK, drop that image onto the Layer, then by adjusting opacity you can change the contrast of object, also using Eraser Tool you can remove unwanted area.

STEP 5:Import Water object by clicking File > Open, then place this water object into the bottom of the Layer, by adjusting opacity you can change the contrast of object.

STEP 6:Import shark fish by clicking File > Open , make a copy of that layer by clicking (ctrl+j),then place it into the left and right side of the person and also Import wood and some more images by clicking File > Open , place onto the ocean in such a way that all that materials will floating in water.
 STEP 7:If all the Editing is done then go to Filter > Camera Raw Filter or else press(shift+ctrl+A) by adjusting the color the whole image, then click OK.

Finally our editing is done successfully then go to File >save , or else press (ctrl+s) to save that image.
STEP 1:
Open Photoshop, Create a new layer by clicking File > New ,then set background height, width, color, and resolution.
STEP 2:
Import the City image by clicking File > Open, select the whole city image by clicking Rectangular Marquee Tool, then Drag city image into the white Layer using Move Tool.

STEP 3:
Import Sea image by clicking File > Open and adjust sea image by clicking Rectangular Marquee Tool, place that sea image exactly middle of the Layer.

STEP 4:
Import Boy image by clicking File > Open , unlock that image by clicking right side of the unlock button , then we have to remove the background of that image by clicking Rectangular Marquee Tool then click in select and mask option on the property bar ,then click select subject, then click OK, drop that image onto the Layer, then by adjusting opacity you can change the contrast of object, also using Eraser Tool you can remove unwanted area.

Import Water object by clicking File > Open, then place this water object into the bottom of the Layer, by adjusting opacity you can change the contrast of object.

STEP 6:
Import shark fish by clicking File > Open , make a copy of that layer by clicking (ctrl+j),
then place it into the left and right side of the person and also Import wood and some more images by clicking File > Open , place onto the ocean in such a way that all that materials will floating in water.

STEP 7:
If all the Editing is done then go to Filter > Camera Raw Filter or else press(shift+ctrl+A)
by adjusting the color the whole image, then click OK.

Finally our editing is done successfully then go to File >save , or else press (ctrl+s) to save that image.
For a glance you can watch this video :
For Download PDF File Click Here Below Button 👇
 For Download Images Click Here Below Button 👇
1. Image1
2. Image2
3. Image3
4. Image4
5. Image5
For Download Images Click Here Below Button 👇
1. Image1
2. Image2
3. Image3
4. Image4
5. Image5
If You Like Photoshop City Underwater Photo Manipulation, Then Give Thumbs up!Hopefully, You love this article, and We believe you have successfully editing your image. Thanks for being with us. If an Query, Share with us your valuable opinion and feedback in the comment section down below.
For a glance you can watch this video :
For Download PDF File Click Here Below Button 👇
For Download Images Click Here Below Button 👇
1. Image1
2. Image2
3. Image3
4. Image4
5. Image5
If You Like Photoshop City Underwater Photo Manipulation, Then Give Thumbs up!
Hopefully, You love this article, and We believe you have successfully editing your image. Thanks for being with us. If an Query, Share with us your valuable opinion and feedback in the comment section down below.
إرسال تعليق