Photo to Oil Painting Effect in Photoshop
Tutorial
In this tutorial, I will show you the steps I took to create the Photo to Oil Painting Effect in Photoshop.
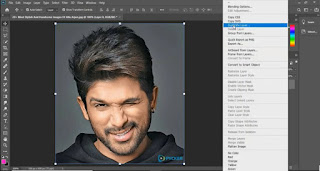
This is also one type of oil painting only but only the difference is, in this, we are not using oil filter, without using oil filter we are editing a photo in photoshop.
Details of Tutorials:- Software: Photoshop CS6
- Completion of Time: 10 Minutes
- Difficulty: Medium
Resources:- Boy Image
- Software: Photoshop CS6
- Completion of Time: 10 Minutes
- Difficulty: Medium
- Boy Image
There are some steps we have to follow.
STEP 1:
Open Photoshop.
STEP 2:
Create a new layer by clicking File > New, then set background height, width, color, and resolution.
STEP 3:
Import man image by clicking File > Open, unlock that image by clicking the right side of the unlock button, then we have to make a copy of that image by clicking the right side of the layer of the image, then make a duplicate of this layer by clicking the right side of this layer and click Duplicate Layer.
STEP 4:
Now we have a original image but the thing is we need some more attractive on this face of image for that we have to configure in brightness like increasing brightness or decresing them to look attractive for that go to Menu bar Tool in that click on Images> Adjustment >Shadows/Highlights and change the Amounts of Shadows and Highlights as shown below. In this Shadows/Highlights Tool both are doing same thing only the difference is they work in opposite direction like if we configure amounts of value in Shadow mode it will increases the brighteness in the darker tone of the image and if we configure amounts of value in Highlight mode it will decreases the brighteness in the lighter tone.
After that if we want to change tonal of image and balancing colour of the image we need to use tool called Levels, in that we can easily change the colour balancing and toning of the image, for that go to Menu bar in that click on Images > Adjustments >Levels, in that change the values as shown below, then make a duplicate of this layer by right clicking of this layer then select Duplicate Layer option.
To make face look like smooth and glowing for that we make use of a tool called HighPass for selecting that tool click on Filter > Other > High pass then set Radius for this layer by 2.0 and click OK.
For creating Vintage Effect we change the layer from Normal to Overlay.
After that select the both layers and right click on these layers then click on Merge Layers.
STEP 5:
For more sharpening of image we make use of tool called Unsharp Mask, by clicking an option on the Menu bar that is Filter > sharpen > Unsharp Mask in that change some values for Amount, Radius and Threshold, then click OK, it all depends on you like how you will showcase your image to the user.
STEP 6:
Again go to the Filter Tool which is present on the Menu bar then click Filter > Stylize > Diffuse in that select Anisotropic then click OK.
After that rotate image in all the directions and apply Diffuse to look better fir that click on Image Tool which is present on the Menu bar then click on Image Rotation, using this tool you can rotate all the angle and apply Diffuse option, then make a duplicate of this layer by right clicking on this layer then select Duplicate Layer.
STEP 8:
If we want to apply random pixels to an image, we use tool called Noise, then if we want to reduced noise from image we use reduced noise for this click on Filter > Noise > Reduce Noise, in that varies some values like shown below.
Repeat same steps 5 as we previous did for unsharpening image, after that make a duplicate of this layer by right clicking on this layer then select Duplicate Layer.
Again to make some more smooth and glowing face we make use of tool called HighPass for selecting that tool click on Filter > Other > High pass then set Radius for this layer by 2.0 and click OK.
STEP 10:
To make background colorfull using brush tool we can make background decorative, for this by clicking left side of the Tool bar click on Brush option then select colour and apply this colour on background, again do same thing for other colour also.
STEP 11:
After that change layer from Normal to Overlay and set opacity as shown below.
Once our all editing is done then go to File >save , or else press (ctrl+s) to save that image.
For a glance you can watch this video :
https://www.youtube.com/watch?v=JSTRMiPVmyQ&t=414s
For Download Images Click Here Below Button 👇
1. Image1If You Like Photo to Oil Painting Effect in Photoshop, Then Give Thumbs up!
Hopefully, You love this article, and We believe you have successfully edited your image. Thanks for being with us. If a Query, Share with us your valuable opinion and feedback in the comment section down below.


Post a Comment