Pubg Lover New Monkey Concept Photo Editing in Photoshop

Tutorial
In this tutorial, I will show you the steps I took to create the Pubg Lover New Monkey Concept Photo Editing in Photoshop.
Details of Tutorials:- Software: Photoshop CS6
- Completion of Time: 33 Minutes
- Difficulty: Easy
Resources:- Monkey Image
- Boy Image
- Software: Photoshop CS6
- Completion of Time: 33 Minutes
- Difficulty: Easy
- Monkey Image
- Boy Image
There are some steps we have to follow.
STEP 1:
Open Photoshop.
STEP 2:
Import a Monkey image poster by clicking File > Open, unlock that image by clicking the right side of the unlock button.

Import a Boy image by clicking File > Open, unlock that image by clicking the right side of the unlock button.

STEP 4:
After that select, only the boy image by clicking the select subject option which is located on the top of the toolbar, and by clicking Quick Selection Tool then click shortcut keywords such as shift keyword for selecting an extra area and alt keyword for deselecting extra area.

STEP 5:
Import one object by clicking File > Open, unlock that image by clicking the right side of the unlock button, and place that object beside the monkey.

STEP 6:
Import car objects by clicking File > Open, unlock those objects by clicking the right side of the unlock button and place that object near the bo image.

STEP 7:
Import wood arrow object by clicking File > Open, unlock those objects by clicking the right side of the unlock button and place that object beside the monkey, then using Eraser option you can erase the unwanted area.

STEP 8:
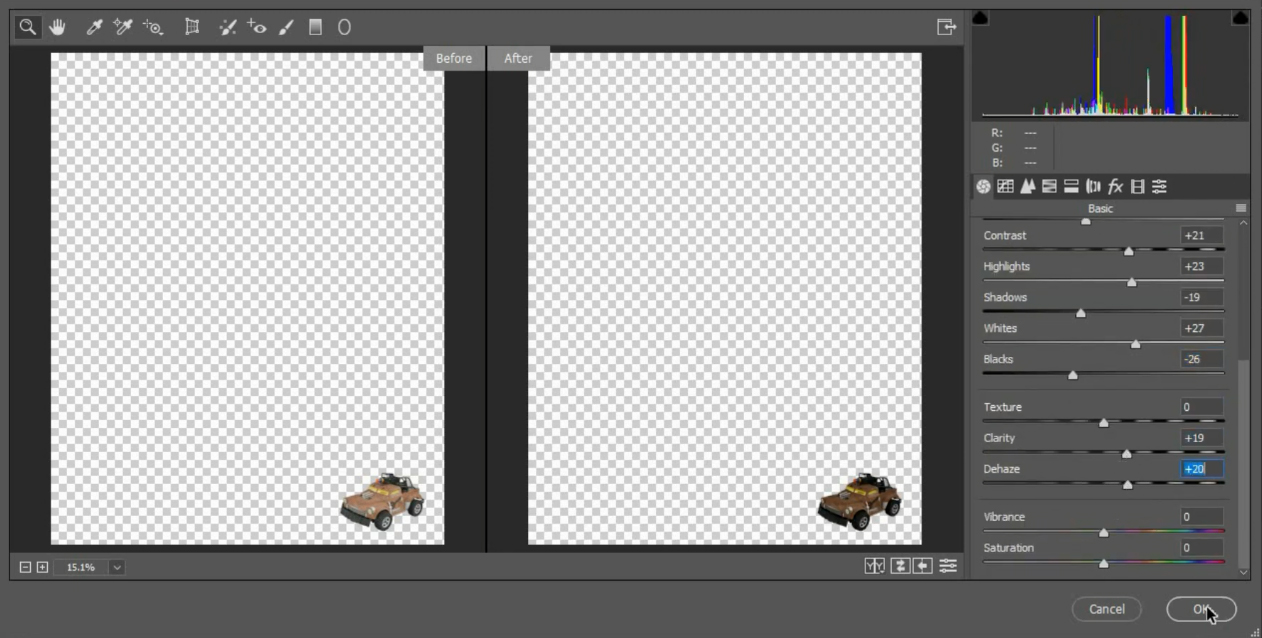
Using Camera Raw Filter you can change the color of the car object like as shown below.
STEP 9:
Change the color tone of the boy image using Camera Raw Filter for that click on Filter > Camera Raw Filter.

STEP 10:
Also, apply this Camera Raw Filter to the rest of all objects as shown below.

STEP 11:
Once you applied Camera Raw Filter to all the objects, then blur that monkey poster layer by clicking Filter > Blur > Gaussian Blur, then set that Gaussian Blur value to 1.5.

STEP 12:
Then adjust the only black and white endpoint of the whole layer for that click on Adjustment Icon which is located at the bottom of the toolbar Adjustment Layer > Levels.

STEP 13:
Once all the Editing is done then click on the save option to save this image.

For a glance you can watch this video :
https://www.youtube.com/watch?v=m3p56r6rZaA
For Download PDF File Click Here Below Button 👇

For Download Images Click Here Below Button 👇
1. Image1If You Like Pubg Lover New Monkey Concept Photo Editing in Photoshop, Then Give Thumbs up! Hopefully, You love this article, and We believe you have successfully edited your image. Thanks for being with us. If a Query, Share with us your valuable opinion and feedback in the comment section down below.
Post a Comment